... Bean-to-Bar Centre Kremser ...
0
... Bean-to-Bar Centre Kremser ...
0
Infothek /
Choco-Mate CM2-Step-by-Step
/

Choco-Mate CM2
Temperierhilfe  /  Tempering-Aid

Erfahren Sie hier ein paar interessante Details zum Herstellen und Verarbeiten von sogenannter Kakaobutter-Silk, also Impfen mit übersättigter Kakaobutter

Find out here a few interesting details about the production and processing of what is known as ‘cocoa butter silk’, i.e. inoculation with supersaturated cocoa butter

Generell

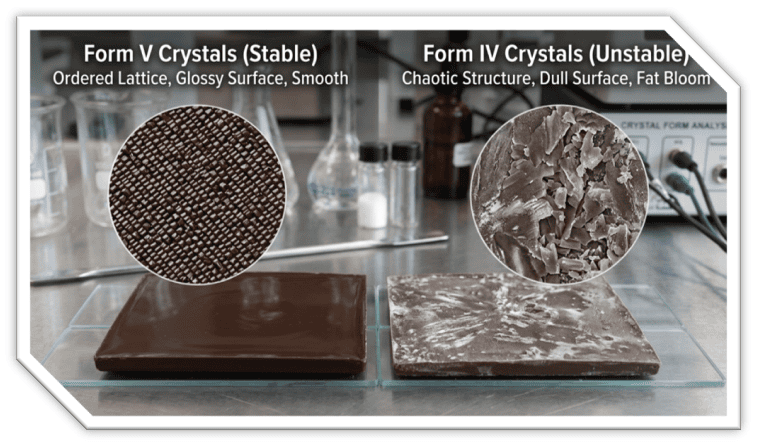
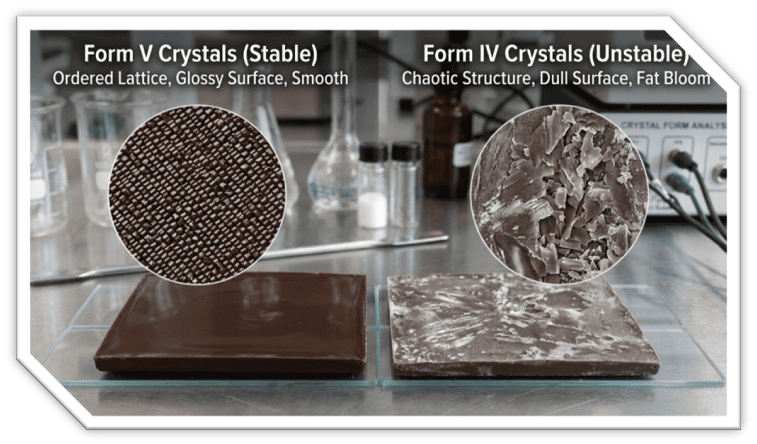
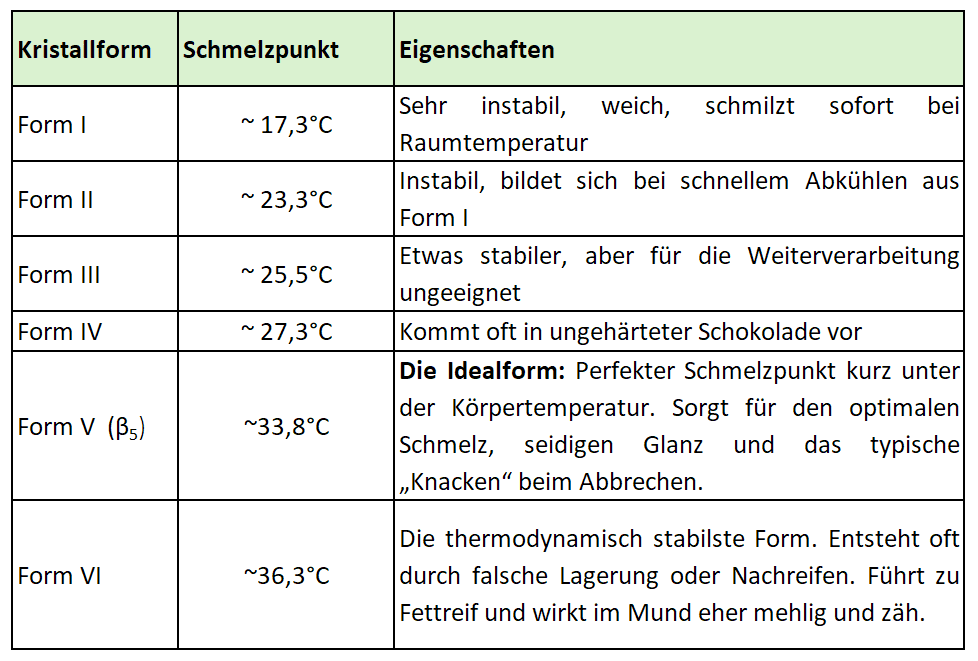
Kakaobutter-Seide (oft auch als Kakaobutter-Inkubat bezeichnet) ist im Grunde Kakaobutter, die über einen langen Zeitraum exakt bei ihrer optimalen Kristallisationstemperatur gehalten wird. Dadurch entsteht eine cremige, salbenartige Konsistenz, die extrem dicht mit den perfekten Form-V-Kristallen besiedelt ist.  Hier eine kleine Tabelle mit den verschiedenen Kristallformen, Schmelzpunkten und Auswirkungen:


Benötigte Ausrüstung

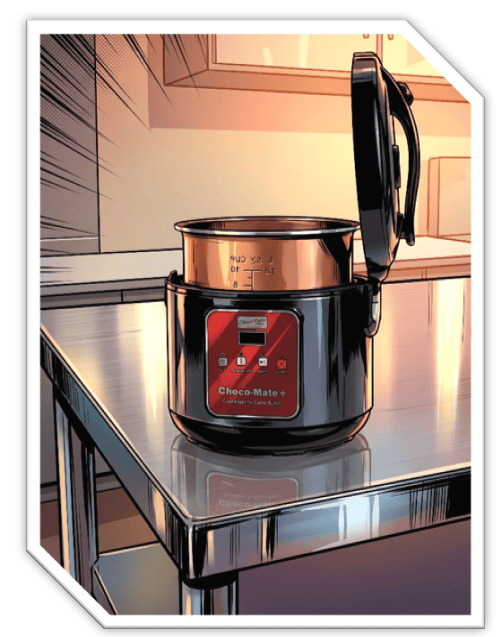
Um die Kakaobutter-Silk selbst herzustellen, benötigst du Ausrüstung, die Temperaturen über Stunden hinweg aufs Zehntelgrad genau halten kann.


·  Reine Kakaobutter:
Idealerweise in Form von Pellets (Drops) oder fein gerieben.

·  Ein Präzisions-Wärmegerät:
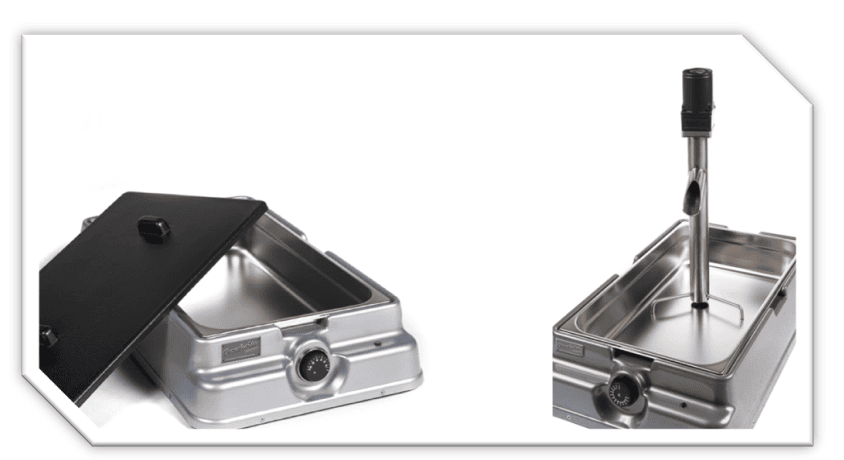
Hierfür ist unser Choco-Mate CM-2 entwickelt worden

·  Ein Vakuumbeutel oder ein Schraubglas 

·  Ein verlässliches Einstichthermometer
zur Gegenkontrolle.

Eventuell eine Waage
Zum Abwiegen der benötigten Menge Silk


General

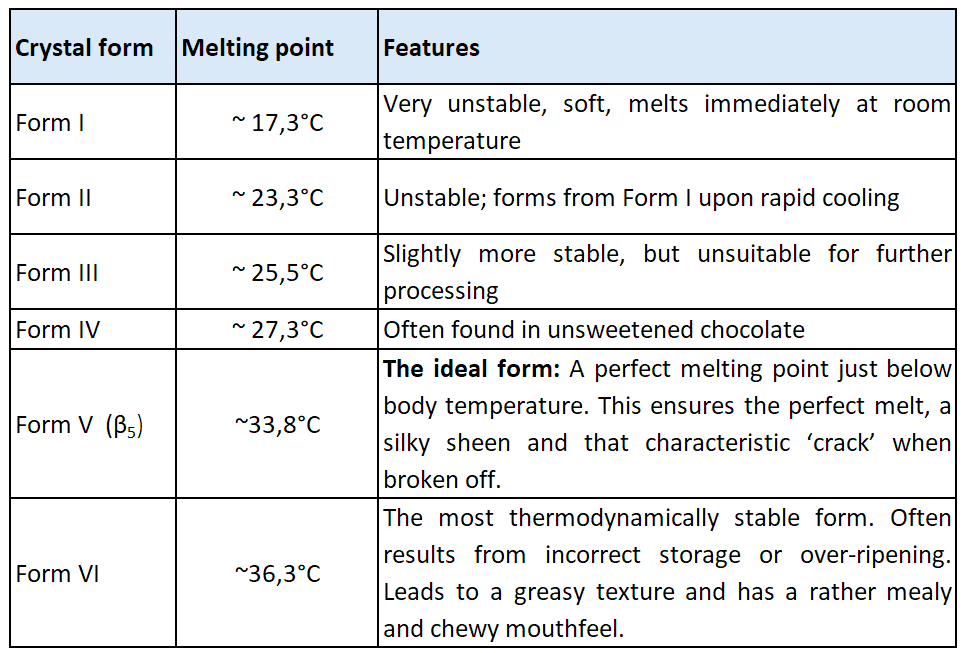
Cocoa butter silk (often referred to as cocoa butter incubate) is essentially cocoa butter that has been maintained at its optimum crystallisation temperature for a long period of time. This results in a creamy, ointment-like consistency that is extremely dense with perfectly formed V-shaped crystals.  Here is a short table showing the different crystal forms, melting points and effects:


Equipment required
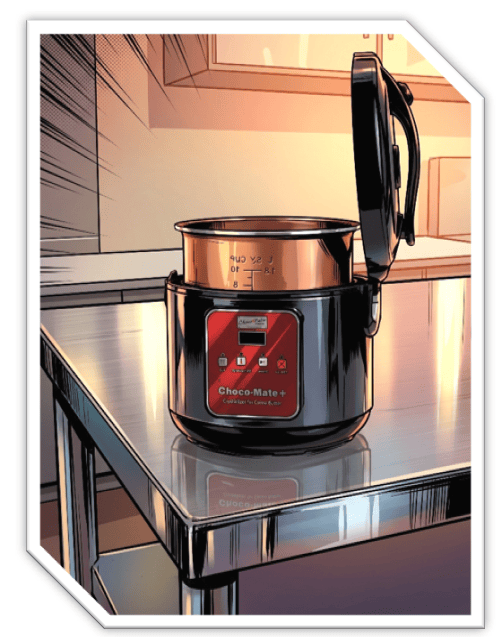
To make your own cocoa butter silk, you’ll need equipment that can maintain temperatures to within a tenth of a degree for hours on end.

·  Pure cocoa butter:
Ideally in the form of pellets (drops) or finely grated.

·  A precision heating device:
Our Choco-Mate CM-2 has been developed specifically for this purpose

·  A vacuum bag or a screw-top jar 

·  A reliable insertion thermometer
for cross-checking.

Possibly a set of scales
to weigh out the required amount of Silk


Schritt-Für-Schritt

Der gesamte Prozess basiert darauf, alle instabilen Kristallformen wegzuschmelzen, während die stabilen Form-V-Kristalle gerade so erhalten bleiben und sich vermehren.


1.Vorbereiten und Setup:

Dauer: 10 Min.. Fülle die Kakaobutter-Pellets in ein sauberes, trockenes Schraubglas oder verschließe sie in einem Vakuum- oder Dressierbeutel. Bereite dein deinen Inkubator Choco-Mate CM-2 vor.


2.Die Zieltemperatur einstellen:

Die Choco-Mate CM2 hat bereits eine Steuerung. Da die Kakaobutter unterschiedlich sein kann, lassen sich über die Position „SILK“ auf dem Gerät 3 vorprogrammmierte Temperaturen wählen:

Stufe 1: Temperatur: 33,0 °C

Stufe 2: Temperatur: 33,5 °C

Stufe 3: Temperatur: 34,0 °C


3.Die Inkubationsphase:

Dauer: 12 bis 24 Stunden.

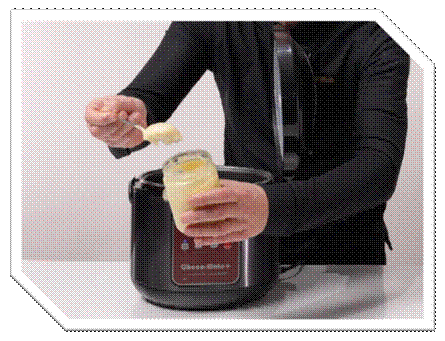
Gib das Gefäß oder den Vakuum- oder Spritzbeutel mit der Kakaobutter in den Choco-Mate CM2. Lass die Kakaobutter für mindestens 12, besser 24 - 48 Stunden im Gerät. Während dieser Zeit schmelzen alle unerwünschten Kristallformen (I bis IV) komplett weg. Was übrig bleibt, ist eine dichte, cremige "Seide" voller Form-V-Kristalle. Es hat eine seidenartige matte Farbe und eine Konsistenz ähnlich Mayonnaise o.ä. Es soll keine flüssige Kakaobutter mehr zu erkennen sein


4.Konsistenz prüfen und lagern:

Sofort einsatzbereit. Nach der Zeit sollte die Butter nicht flüssig wie Öl sein, sondern eine Textur wie weiche Butter oder Vaseline bzw. Mayonnaise haben. Du kannst sie nun direkt zum Impfen nutzen oder bei Raumtemperatur (ca. 18–20 °C) für spätere Einsätze lagern.

Arbeiten mit Schokolade:
​Schmelzen / Impfen / Verarbeiten

Die benötigte Ausrüstung

Für eine ordentliche Produktion wird natürlich auch eine entsprechende Ausrüstung benötigt. Die Ausrüstung hängt natürlich auch von Ihren Produkten ab. Wollt Ihr mehr tunken bzw. überziehen? Oder doch eher viel in Formen gießen, also Tafeln herstellen? Eine ausgewogene Ausrüstung sieht ungefähr wie folgt aus:


Aufschmelzbehälter
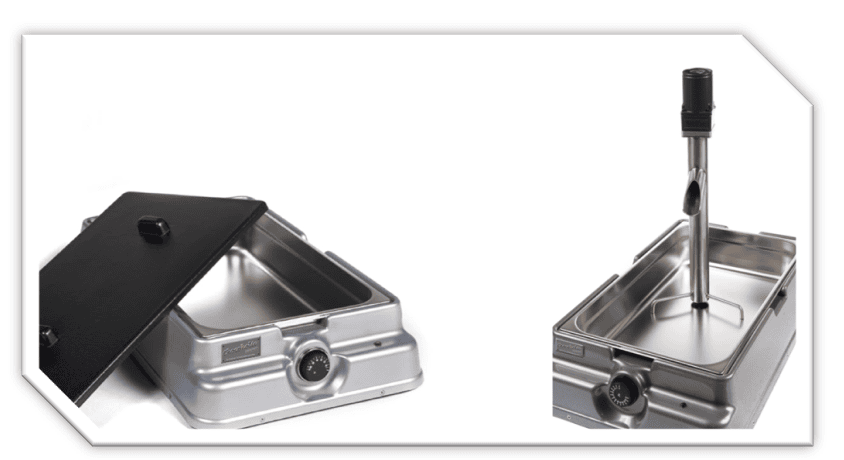
3kg, 6kg, 12 kg oder gar 20 kg, je nach Bedarf. Am besten sind Geräte mit Heizung an allen 5 Seiten und mit digitaler Anzeige / Einstellung, da man wesentlich genauer arbeiten kann als mit dem Drehrad. Für reines Aufschmelzen wäre es egal, aber später zum Impfen brauchen wir eine genaue Temperatur. Bitte auch darauf achten, dass man den Behälter herausnehmen kann. Es gibt Geräte auf dem Markt, die zwar gut heizen, aber man kann den Behälter nicht herausnehmen. Immer reinigen ist auf die Dauer extrem ärgerlich.

Digitales Stabthermometer
In guter Qualität. Stabthermometer sind besser und genauer als Infrarot-Thermometer. Für kurzes Überprüfen der Oberfläche reicht aber auch ein Infrarot-Gerät

Evtl. Pumpe oder Förderrad:
Wenn optional erhältlich und man viele Tafeln herstellen möchte, lohnt sich die Investition in eine Pumpe, um nicht immer mit einer Schöpfkelle arbeiten zu müssen. Die Pumpfunktion dient auch zum besseren Umwälzen der temperierten Masse. Ein Löffel tut es aber auch.

Pralinengabeln & Ablaufgitter:
Wenn man überziehen möchte. Produkte werden dann in der Masse getunkt und auf einem Ablaufgitter kann die Schokolade wieder abtropfen

Rüttler:
Kein „Must have“ am Anfang. Wer aber viele Tafeln herstellt, wird sicher irgendwann den Wunsch haben, ein Rütteltisch zum Abvibrieren der Formen zu nutzen. Es entfällt das lästige manuell Klopfen an der Tischkante


Kühlschrank:
Optimal wäre ein sogenannter Schokoladenkühlschrank. Die haben normal einen Temperaturbereich von 10-18°C und, was noch wichtiger ist, eine integrierte Lufttrocknung. Die optimale Feuchte im Kühlschrank liegt bei ca. 40-45% r.F..

Formen:
Wenn man Tafeln oder Pralinen aus der Form heraus herstellen möchte, braucht man adäquate Formen, z.B. harte Makrolonformen, da Schokolade beim Kühlen schrumpft und eine harte Wand nicht nachgeben kann. So löst sich die Schoki besser aus der Form

Arbeitsschritte

Auf jeden Fall müssen wir auf folgende Arbeitsprozesse vorbereitet sein:


Aufschmelzen von einer oder mehrerer Massen
Normalerweise sind ca. 45°C eine gute Temperatur, um alle Massen zum Schmelzen und alle Kristallformen aufzulösen. Meist wird über Nacht aufgelöst. Man kann einen Schmelzer nutzen oder einen Wärmeschrank mit Umluft (gleichzeitig mehrere Massen auflösen)

Herunterkühlen der Masse im Behälter:
Dies kann entweder direkt in dem Behälter für das Aufschmelzen erfolgen, indem man den Behälter / Aufschmelzer auf ca. 33,5°C einstellt und einfach in einem kühlen Raum stehen lässt. Die Masse kühlt runter und bei 33,5°C schaltet sich automatisch die Heizung ein. Aber bitte daran denken, dass der Temperaturfühler nicht in der Masse steckt, sondern außerhalb des Behälters. Die Massetemperatur dringt aber auch nach draußen zum Fühler. JE nach Masse kann die Temperatur auch variieren. Hier ein paar Eckdaten:

Dunkle Schokolade: Einstellung: Ca. 34°C, Verarbeitung ca. 32/33°C
Milchschokolade: Einstellung: Ca. 31°C, Verarbeitung ca. 30/31°C
Weiße Schokolade: Einstellung: Ca. 29°C, Verarbeitung ca. 28/29°C
Impfen mit übersättigter Kakaobutter aus dem Choco-Mate CM2:
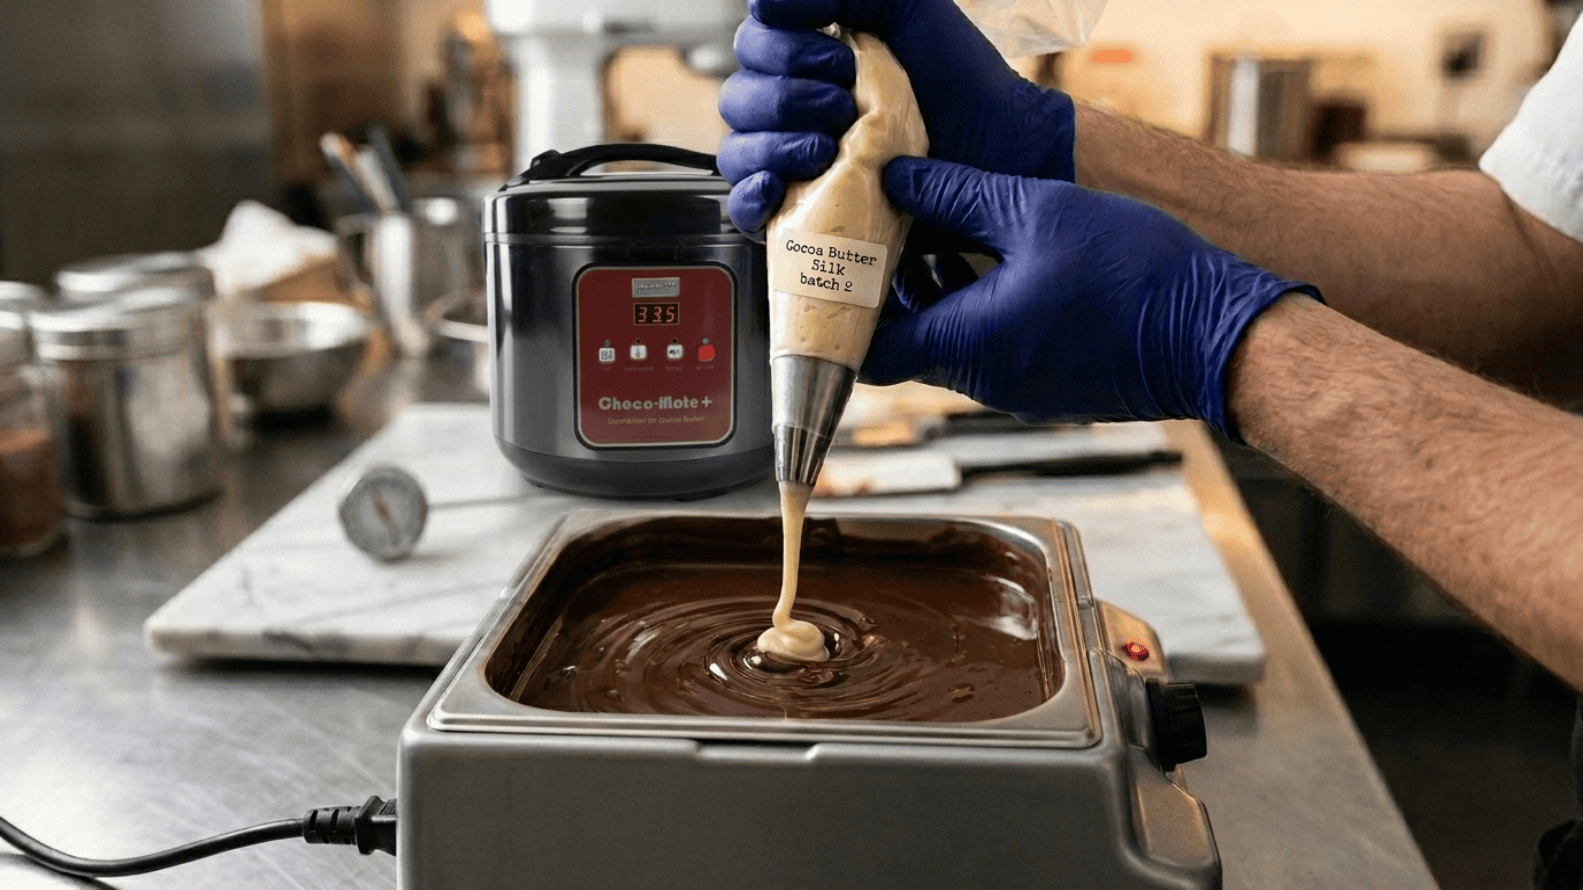
Wenn die Masse bei ca. 33,5 °C ist, kann die Kakaobutter-Silk der Schokoladenmasse zugeführt werden. Benötigt wird nur ca. 1 % der Kakaobutter-Silk, d.h. bei 5 KG Masse werden nur 50 gr Silk benötigt. Danach heißt es gut umrühren, dass sich die Kristalle gut verteilen können. Sie können dann auch unverzüglich mit der Arbeit anfangen. Ein „runterkühlen“ und „Nachwärmen“ ist hier nicht notwendig, da wir ja fast nur stabile Kristalle in der Masse haben.

Testen mit Plastik-Spatel:
Vor Anfang der Produktion sollte man nochmals die Temperierung überprüfen. Man kann etwas temperierte Masse auf einen Plastik-Abstreifer oder Plastiklöffel geben. Dann zur Seite legen und kühlen lassen. Die gekühlte Masse sollte glänzen und einen guten Knack haben. Streifen oder graue Oberfläche sind nicht erwünscht. Da muss man dann noch mit der Temperatur nachhelfen (Oder die Kakaobutter war nicht richtig kristallisiert)

Step-by-step

The whole process is based on melting away all the unstable crystal forms, whilst the stable V-shaped crystals are just about preserved and multiply.


1. Preparation and set-up:

Duration: 10 mins. Transfer the cocoa butter pellets to a clean, dry screw-top jar or seal them in a vacuum or piping bag. Prepare your Choco-Mate CM-2 incubator.


2. Set the target temperature:

The Choco-Mate CM2 is already equipped with a control panel. As the cocoa butter can vary, the ‘SILK’ setting on the machine allows you to select from three pre-programmed temperatures:

Level 1: Temperature: 33.0 °C
Level 2: Temperature: 33.5 °C
Level 3: Temperature: 34.0 °C


3. The incubation phase:

Duration: 12 to 24 hours. Place the container or the vacuum or piping bag containing the cocoa butter into the Choco-Mate CM2. Leave the cocoa butter in the machine for at least 12 hours, or preferably 24–48 hours. During this time, all undesirable crystal forms (I to IV) will melt away completely. What remains is a thick, creamy ‘silk’ full of Form V crystals. It has a silky, matt colour and a consistency similar to mayonnaise or similar products. No liquid cocoa butter should be visible.


4. Check the consistency and store:

Ready for immediate use. Once the time is up, the butter should not be as runny as oil, but should have a texture similar to soft butter, Vaseline or mayonnaise. You can now use it straight away for inoculation, or store it at room temperature (approx. 18–20 °C) for later use.

Working with chocolate:
​Melting / Tempering / Processing

The equipment required

Of course, proper production also requires the right equipment. The equipment you need will, of course, depend on your products. Do you want to do more dipping or coating? Or would you prefer to pour a lot into moulds, i.e. make chocolate bars? A well-balanced set of equipment would look something like this:


Melting vessel
3 kg, 6 kg, 12 kg or even 20 kg, depending on your needs. The best units are those with heating on all five sides and a digital display/control, as they allow you to work much more precisely than with a dial. For simply melting the wax, it wouldn’t matter, but later on, when inoculating, we need an accurate temperature. Please also make sure that the container can be removed. There are units on the market that heat up well, but where you cannot remove the container. Having to clean it constantly is extremely annoying in the long run.

Digital rod thermometer
Good quality. Clinical thermometers are better and more accurate than infrared thermometers. However, an infrared device is sufficient for a quick check of the surface temperature.

Possibly the pump or impeller:
If a pump is available as an optional extra and you want to make a lot of bars, it’s worth investing in one so you don’t always have to use a ladle. The pump function also helps to circulate the tempered mixture more effectively. However, a spoon will do the job just as well.

Chocolate forks & cooling racks:
If you want to coat them. The products are then dipped into the mixture and the chocolate can drip off onto a draining rack.

Vibrating table:
It’s not a ‘must-have’ to start with. But anyone who makes a lot of slabs will surely, at some point, want to use a vibrating table to shake the moulds. This does away with the tedious business of tapping them manually on the edge of the table.

Fridge:
Ideally, you would want what is known as a chocolate fridge. These usually have a temperature range of 10–18 °C and, more importantly, a built-in air-drying system. The optimum humidity inside the fridge is around 40–45% relative humidity.

Moulds:
If you want to make chocolate bars or pralines using a mould, you need suitable moulds, e.g. hard Makrolon moulds, as chocolate shrinks as it cools and a hard wall won’t give way. This makes it easier to remove the chocolate from the mould

Steps

In any case, we must be prepared for the following work processes:

Melting one or more batches
Normally, around 45°C is a good temperature for melting all batches and dissolving all crystal forms. This is usually done overnight. You can use a melter or a convection oven (to melt several batches at the same time)


Cooling the compound in the container:
This can be done either directly in the melting container by setting the container/melter to around 33.5°C and simply leaving it in a cool room. The mixture cools down and, at 33.5°C, the heating switches on automatically. However, please bear in mind that the temperature sensor is not immersed in the mixture but is located outside the container. The temperature of the mixture does, however, reach the sensor. The temperature may also vary depending on the type of mixture. Here are a few key figures:

Dark chocolate: Setting: approx. 34°C, working temperature approx. 32/33°C
Milk chocolate: Setting: approx. 31°C, working temperature approx. 30/31°C
White chocolate: Setting: approx. 29°C, working temperature appr. 28/29°C


Seeding with supersaturated cocoa butter from the Choco-Mate CM2:
When the mixture reaches approx. 33.5 °C, the cocoa butter silk can be added to the chocolate mixture. Only approx. 1% of the cocoa butter silk is required; for example, for a 5 kg batch, just 50 g of silk is needed. Stir thoroughly afterwards to ensure the crystals are evenly distributed. You can then start working straight away. There is no need to ‘cool down’ or ‘reheat’ the mixture here, as it contains almost exclusively stable crystals.


Testing with a plastic spatula:
Before starting production, you should check the tempering once more. You can place a small amount of tempered mass onto a plastic scraper or plastic spoon. Then set it aside and leave it to cool. The cooled mass should be glossy and have a good snap. Streaks or a grey surface are undesirable. In that case, you’ll need to adjust the temperature (or the cocoa butter hasn’t crystallised properly).

Items have been added to cart.
One or more items could not be added to cart due to certain restrictions.
In den Warenkorb gelegt
Menge aktualisiert
- Fehler aufgetreten. Bitte versuchen Sie es nach etwas Wartezeit noch einmal.
Aus dem Warenkorb gelöscht
- Dieses Produkt kann momentan nicht aus dem Warenkorb gelöscht werden. Bitte versuchen Sie es nach etwas Wartezeit noch einmal.